— — — — —
— — — — —
— — — — —
— — — — —
— — — — —
— — — — —
— — — — —
— — — — —
Although RPG in a Box is primarily for creating 3D games, you can also create games that have a 2D appearance by making use of several different features. The Kenney Tiny Dungeon project template that comes with RPG in a Box is set up in this way and is a great reference for seeing how it works. The guide below will walk you through the necessary steps for setting up your own 2D game!
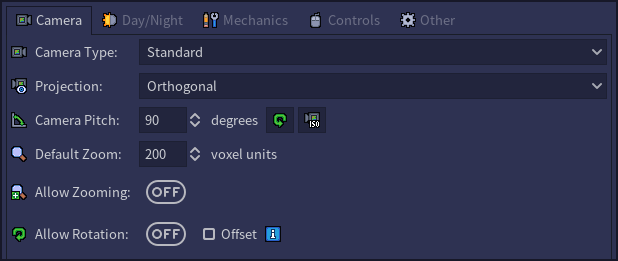
To set up the camera for a 2D game, open the Game Configuration dialog and go to the Gameplay section. From the Camera tab, choose “Standard” for the Camera Type setting, and choose “Orthogonal” for the Projection setting. Then change the Camera Pitch to 90 degrees. This will place the game camera directly above the map facing downwards. With an orthogonal camera projection there won't be any perspective, thus giving the scene a two-dimensional appearance!
You'll also want to disable the Allow Rotation setting by toggling it off. This will prevent the player from rotating the camera. Optionally, you can also disable zooming and tweak the default zoom amount if you want your camera to remain at a fixed distance from the scene.
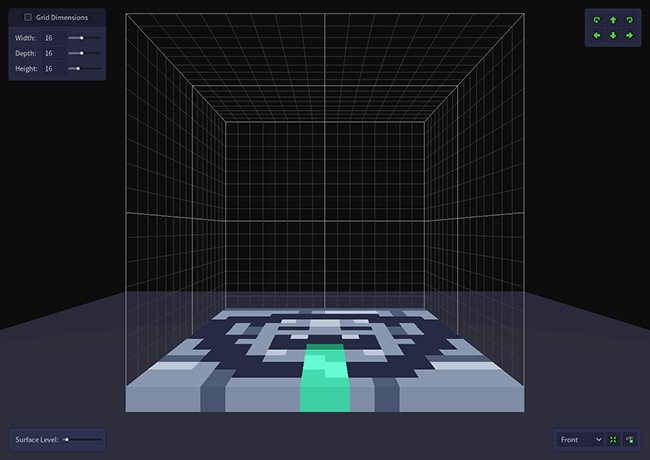
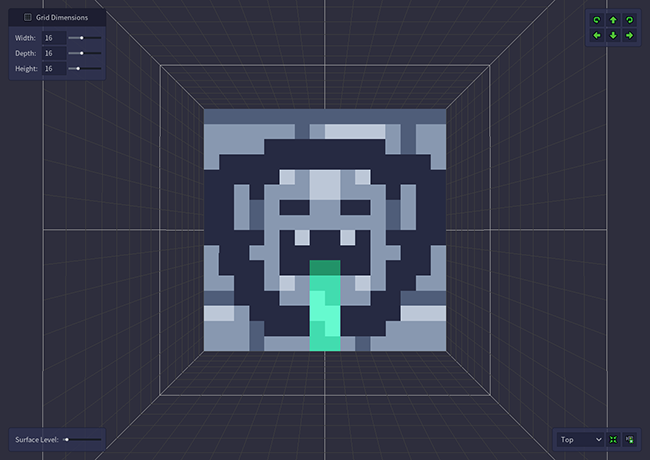
When creating tiles and objects for your game, keep in mind that they'll be viewed from directly above. It's recommended to use the Top view in the Voxel Editor as it's easier to draw 2D assets in this way, and you'll be seeing them as they will appear in-game. The examples below show how a 2D tile will look from the Front view and Top view in the editor.
You'll build your maps in the Map Editor in the same way as a 3D game, however it's recommended to use the “Top-Down” camera when doing so. This is located on the toolbar along the top, as shown below. When activated, it switches the camera to orthogonal projection, places it directly above the map, and locks rotation. While in this camera mode, you'll be viewing the map exactly as it will appear in-game.

Similar to tiles and objects, the characters for your game also need be drawn flat along the bottom of the voxel grid. The example below shows how a 2D character will look from the Top view in the editor.
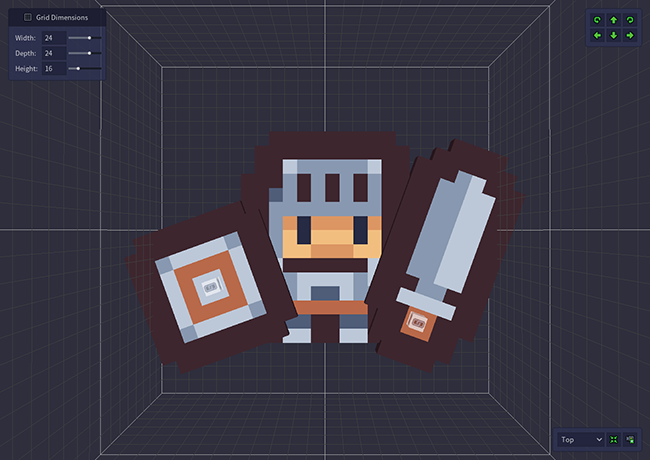
Enable the “Two-Dimensional” setting on the Model Properties tab for any characters. This setting tells the game to not rotate the model towards the direction the character is moving. Since camera rotation is disabled and the player will always be viewing the game from a fixed angle, this will ensure the character remains upright at all times.

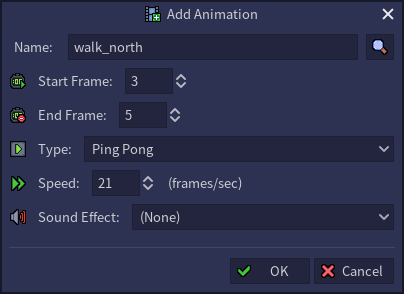
In addition to the “Two-Dimensional” setting, you'll need to define directional animations for your characters. If defined for a character, a directional animation will trigger when they are facing in that direction. For example, if the character has an animation named “walk_north”, that animation will play when they walk in a northward direction, otherwise the normal “walk” animation will play. Note that these animations don't necessarily need to be unique, so if desired you can just create one animation for walking, then define “walk_north”, “walk_south”, “walk_west”, and “walk_east” all to use that same set of frames. See Predefined Animation Names for a full list of directional animation names that are currently supported.
Since the camera in a 2D game has no perspective, tiles can be layered above each other at the same XY position and still remain flush along the edges. You can take advantage of this to add depth to your scene, for example to allow characters to pass underneath or behind something.
In the example shown below, the wall tiles in the center are placed at a Z level high enough to allow the player character and their attached weapons to pass underneath without clipping through. In this specific case, the floor tiles are at a Z level of 0, and the wall tiles are at a Z level of 3.