Dialogue Editor
Contents
Overview
The Dialogue Editor is used to create dialogue for the characters in your game.
Components
Toolbar
The toolbar directly above the Dialogue Graph is used to add nodes to your dialogue. Clicking on one of the types, such as NPC, will add a node of that type to the visual graph. The node can then be moved around and connected to other nodes.
Node Buttons
- NPC: Adds a node for text that will be spoken by the character to which the dialogue is attached (i.e. the NPC).
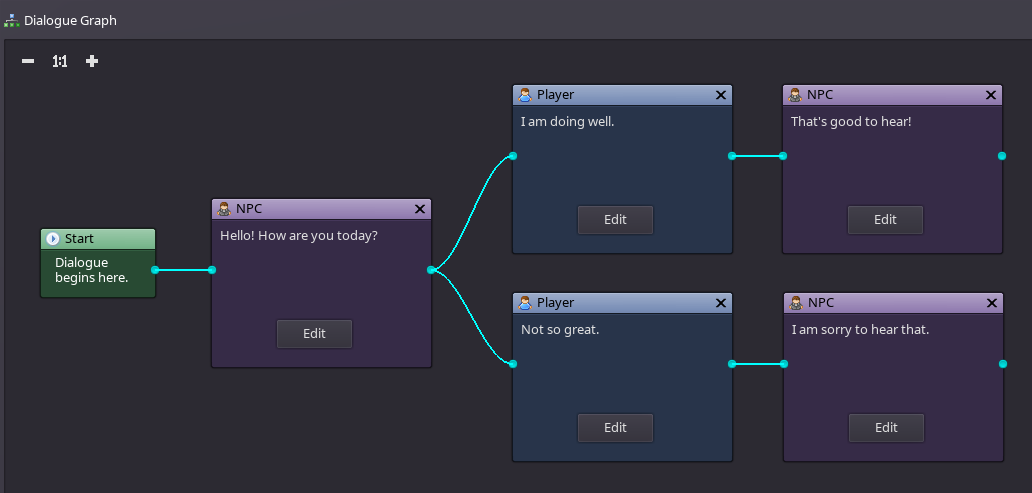
- Player: Adds a node for text that will be spoken by the player character. If multiple Player nodes are connected to a single output, the player will be presented all as options to choose from.
- Message: Adds a node for text that will be displayed as a message (i.e. not dialogue spoken by anyone).
- Condition: Adds a node that will evaluate a conditional expression. Two output nodes can be connected to this node type, one for a "true" evaluation and one for "false".
- Script: Adds a node that will trigger a script to execute.
Other Buttons
- Select All: Selects all nodes in the dialogue graph.
- Select None: Deselects all nodes in the dialogue graph.
Dialogue Graph
The Dialogue Graph is the workspace where you will create your dialogue. Once you have added nodes to your dialogue, you can click and drag to move them around. To connect two nodes together, click on the output connector of one then drag to the input connector of another. In order to have a valid dialogue, you need at least one node connected to the Start node. Nodes can be removed from the Dialogue Graph by clicking on their "X" button located in the upper right corner of the node.
