Voxel Editor
From Wiki | RPG in a Box
Contents
Overview
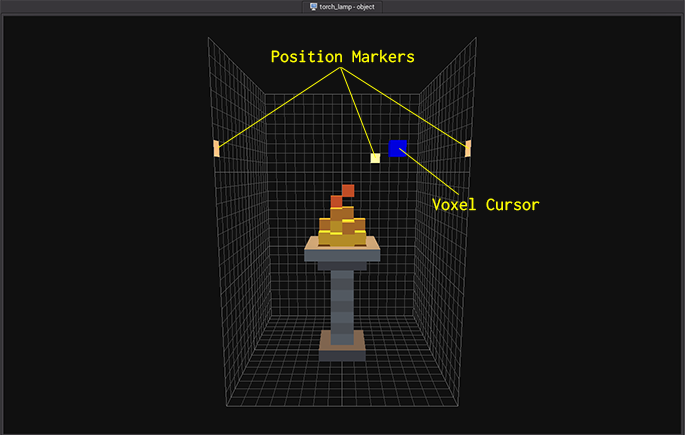
The Voxel Editor is where you will create the voxel models for your tiles, objects, and characters. It is similar to drawing pixel art but with a third dimension. You select a color and then click (or click and drag) to draw voxels. The depth of the cursor (forward and backward) is adjusted using the scroll wheel on your mouse.
Components
Toolbar
-
 New: Opens the New Resource dialog.
 -
 Save: Saves the voxel model. This will become enabled any time changes have been made to the model.
 -
 Save As: Saves the voxel model to a new file with a different name. A dialog will open to prompt for the new name and type (tile, object, or character). Once saved, the voxel model will be opened in a new tab.
 -
 Clear: Removes all voxels from the current frame.
 -
 Import: Imports voxel data from the MagicaVoxel (.vox) format (experimental feature).
 -
 Export: Exports the current frame into a .OBJ format file that can be loaded into external applications such as Blender.
 -
 Draw Mode:
 -
 View Mode:
 -
 Voxel Color:
 -
 Shift Model Up:
 -
 Shift Model Down:
 -
 Shift Model Left:
 -
 Shift Model Right:
 -
 Shift Model Forward:
 -
 Shift Model Backward:
3D View
Animation Toolbar
Properties Panel
Controls/Shortcut Keys
Edit Mode
- Left Mouse Button: Place voxel at cursor position.
- Scroll Wheel: Adjust depth of voxel cursor.
- D: Delete voxel at cursor position.
- E or Middle Mouse Button: Grab voxel color at cursor position (eyedropper).
- Right Mouse Button + Drag: Rotate camera.
View Mode
- Right Mouse Button + Drag: Rotate model.

